Monday, April 1, 2013

Testing the Web Service secured by “Client Certificate” Authentication via SOAP UI.


Client Key generation and exporting the public certificate


1)  Generate the Self Sign certificate or get the certificate from some vendor. We will discuss the steps to generate the Self  Sign certificates
                   A)  Set the java class path to run the keytool
                   B)  Use the below to generate the keys
C:\ identity>keytool -genkey -alias tesclient -keyalg RSA -keystore  SSKeystore.jks
Enter keystore password: XXXXX
Re-enter new password: XXXXX
What is your first and last name?
  [Unknown]:  consumer
What is the name of your organizational unit?
  [Unknown]:  SOA
What is the name of your organization?
  [Unknown]:  MyCompany
What is the name of your City or Locality?
  [Unknown]:  Hillsborough
What is the name of your State or Province?
  [Unknown]:  NJ
What is the two-letter country code for this unit?
  [Unknown]:  US
Is CN= consumer, OU=SOA, O= MyCompany, L= Hillsborough, ST=NJ, C=US correct?
  [no]:  yes

Enter key password for < tesclient >
        (RETURN if same as keystore password):


2) Export the public certificate and give to the Service provider. Service provider should store this certificate in the trust.
C:\identity>keytool -export -alias tesclient  -file Client.crt -keystoe SSKeystore.jks
Enter keystore password:
Certificate stored in file <Client.crt>


Testing with SOAP UI

1) If you will try to print the WSDL of the secured web service from Browser you will get the “Error 401—Unauthorized”  as expected
2) If you try to add the WSDL from SOAP UI, you will get the error  in loading the WSDL as expected as this is secured by client authentication.

3) In SOAP UI , navigate to File->Preferences-> SSL Settings. Fill the below fields. Refer the link for more description.
Keystore
Set the path of your keystore
C:\ identity\ SSKeystore.jks
Keystore Password
Enter the keystore password
XXXXX
Client Authentication
Select

4) Now add the WSDL of the secured web service and test service. You will get the required output.


Friday, March 22, 2013

Configuring the FTP Adapter in SOA 11g for SFTP


Configuring the FTP Adapter in  SOA 11g for SFTP

1)  SOA Host – This is a SFTP client host that will host the FTP adapter.
2) SFTP Server- Remote SFTP server on which you want to put or get the file.

Setting up the SFTP communication based on Public key

1) Navigate to /home/<<User1>>/.ssh directory of the SOA Host.
2) Execute the below command “ ssh-keygen”. This will generate the pair of public key and private key
$ ssh-keygen
Generating public/private rsa key pair.
Enter file in which to save the key (/home//<<User1>>/.ssh/id_rsa):
Enter passphrase (empty for no passphrase):
Enter same passphrase again:
Your identification has been saved in /home//<<User1>>/.ssh/id_rsa.
Your public key has been saved in /home//<<User1>>/.ssh/id_rsa.pub.
The key fingerprint is:
dddddddddddddddddddddddddddd /<<User1>>”SOAHost
The key's randomart image is:
+--[ RSA 2048]----+
|   
3)  Copy the public key of the SOA Host to remote  SFTP server’s authorized_keys file. This file is located in  “/home/<<user2>>/.ssh” directory.  Public key of the SOA server is in file “id_rsa.pub” file. Just copy the text content and copy in authorized_keys.

On Target server make sure the file and directory permission should not be too open,You can execute the below commands

cd ~
cd .ssh
chmod og-rw authorized_keys
chmod a-x authorized_keys
cd ~
chmod 700 .ssh

Also you /home/user2 should not be too open.
cd /home
chmod go-wrx user2
Also chmod 755 /home/user2 if you application need for some reason


4)  Test the SFTP setup. Login to SOA server and ssh to Remote SFTP server. One time you have to establish the authenticity of the remote SFTP server for that enter “Yes”. Please note you should prompt you for password. If this prompt of password then please review the above steps.
[user1@SOAHOST ~]$ ssh <<user2>>@ SFTPHOST
The authenticity of host IPADDRESS (IPADDRESS)' can't be established.
RSA key fingerprint isXXXXXXXXXXXXXXXXXXXX
Are you sure you want to continue connecting (yes/no)? yes
Warning: Permanently added IPADDRESS (RSA) to the list of known hosts.
 [<<user2>>@f14 ~]$

In this was you have successfully set-up the public key based Secure FTP connection from SOA Host to Remote FTP.

FTP Adapter configuration in WebLogic Application server:

  1.    Note down the JNDI name of the FTP server that you configured in the Jdeveloper. In my case this is eis/hcgftp/FtpAdapter
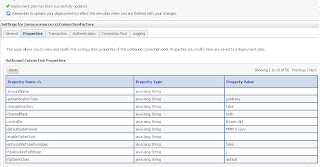
2)Login to WebLogic console and navigate to Deployments->FtpAdapter-> Outbound Connection Pool. In “javax.resource.cci.ConnectionFactory” connection pool .Create the instance with the name of “eis/hcgftp/FtpAdapter”.

3)  Select the “eis/hcgftp/FtpAdapter”  and update the below properties’ value with the bold typed value
         a. authenticationType – publickey
         b. host-                <<Remoted SFTP Server Host>>
         c. port -                22
         d. privateKeyFile-  /home/<<user1>>/.ssh/id_rsa 
         e. username –      <<user2>>
         f. useSftp –           true
4) After this update the deployment FTPAdpter. Activate the changes. 


After update you get the message that two “However 2 items must be restarted for the changes to take effect.”   There is no need to start the server or no need to stop and start the FTPAdapter deployment. Only Updating the FTPAdapter deployment is enough to make File Adapter working.
5.  FTP adapter Service is ready to used by other SOA components